


 Posts
Posts


From the ever popular Pioneer Woman! Ree makes the EASIEST pizza crust ever and it is delicious.
1 tsp Instant or Active Dry yeast
1 1/2 C Warm Water
4 C All Purpose Flour
1 tsp Kosher Salt
1/3 C Olive Oil
Sprinkle Yeast over 1 1/2 C warm water. Let stand for a few minutes.
In mixer, combine flour and salt. With the mixer running on low speed (with a paddle attachment), drizzle in olive oil until combined with the flour. Next, gently stir together the water/ yeast mixture and pour it in, just until combined, and the dough comes together in a sticky mass.
Coat a separate mixing bowl with a light drizzle of olive oil and form dough into a ball. Toss to coat dough in olive oil, then cover the bowl tightly with plastic wrap and set it aside for 1 to 2 hours. You can also store in the fridge until you need it (I agree with Ree and think its even better a few days later.) I usually make this on a Sunday afternoon and we use it whenever we make pizza casserole that week.
When you are ready for pizza, preheat the oven to 400. Grab half the dough (this recipe makes enough for two, but I halve the recipe occasionally and it works perfectly) Roll the pizza dough out with a rolling pin or just pull it with your fingers- I usually end up rolling first and then finishing it off just stretching it with my hands. When the crust is nice and thin, lay it on an oiled baking sheet or pizza pan. Drizzle a little olive oil on the edges of the dough and spread it with your fingers. Sprinkle a little salt on after then top with your favorite toppings. Bake for 15-17 minutes or until crust is golden.
One of my favorites that Pioneer Woman makes is Fig-Prosciutto Pizza with Arugula- it is AMAZING and even Patrick loves it! Check out this recipe- and her whole site- its amazing and she has pictures of the step by step pictures of anything she's cooking.
Saturday, January 15, 2011

Tuesday, January 11, 2011
One more "not quite as quick" update
While we are on the subject, I have one more quick update. I say not quite as quick because it wasn't a 30 minute update. Well part of it was- my part. But then I had to have the seat and back made because its a pretty old director's chair and not a standard size which really I'm SO thankful for now because it came out sooo much cuter than if I had just put a standard/ solid canvas seat on it.
Here's the before of the chair- keep in mind Patrick has had this chair in his apartment probably since college and its always traveled with him.
 I love the chair and its so useful but I've always hated the fabric- it just looked so dated. Say hi to Stonewall Jackson McGown next to the chair... HI STONEWALL!


Here's the before of the chair- keep in mind Patrick has had this chair in his apartment probably since college and its always traveled with him.

Anyways, after we moved I decided it was time for a change so with some 80 grit sand paper and some of this: all surface spray paint that you can tilt at any direction and it will still spray (super ergonomic!)

I painted the frame of the chair, taping off the hardware so as to keep the contrast. This paint is AMAZING. It is so easy to use and goes on so smoothly- no drips at all. I will warn you though, the fine mist will stick to anything- I had lots of cardboard down but it was clearly not enough as you can still see a little white spray paint mist on the patio! OOPS ;)
Then i ordered some fabric and had a tailor make the seat and back and this is what we got:

Pretty drastic change for such little work- and now I just love it! Especially sitting in our dark navy guest room! Perfection.
Quick Update
When we moved back in July to our ivy covered house and put all of our furniture in place (at least temporarily, as things move often around here) it was painfully obvious that we needed some sort of china cabinet or buffet table to go in the dining room:


 I was content for about 30 minutes- then I was thinking- i wish it were lighter in the back so the crystal would show up better, and I wonder if I can get the felt off. My mother in law and I had already pondered what the felt had really been for. So, I decided I could probably do some sort of quick update by covering the back with .... wrapping paper!!! Its so much cheaper than wallpaper and it was pretty much already the same width as our cabinet. And I could get my hands on it the next day- instant gratification! So I went online and found some super cute wrap at The Container Store (because its such high quality and much thicker than most wraps) and found the "Pleasing Paisley"
 how cute is that, and I was already in love with the name! So I picked up a roll for $4.99 and got to work. To take out all of the objects, shelves, line the back and the bottom (to cover the felt) took me about 30 minutes MAYBE and some extra strength double sided tape, which I already had. And this is what I got:

 And it was about the EASIEST 'makeover' if you can even call it that! you can see we've also hung the silver platter- another fun wedding gift that I LOVE to display- above the cabinet to make it feel a little taller overall. And I'm still working with the serving pieces up on top- haven't quite found an arrangement that I like, but I'm sure I will eventually! Anyways, that's my quick update for the day. I still have urges occasionally to refinish/ paint it something lighter to fit the space a little better but I'm undecided! And I wouldn't feel comfortable making any more permanent changes like that without asking first- it is a family piece after all! But in the meantime we are just loving it and all the pretty pieces its holding :) Don't you?
 Random FYI- this is without the dining room end chairs that I LOVE!!! Because they are sitting next to the TV in the living room for more seating- but even without the chairs- it doesn't look this bare in real life- I don't like this picture now- the room looks bare...but its not! I promise :)
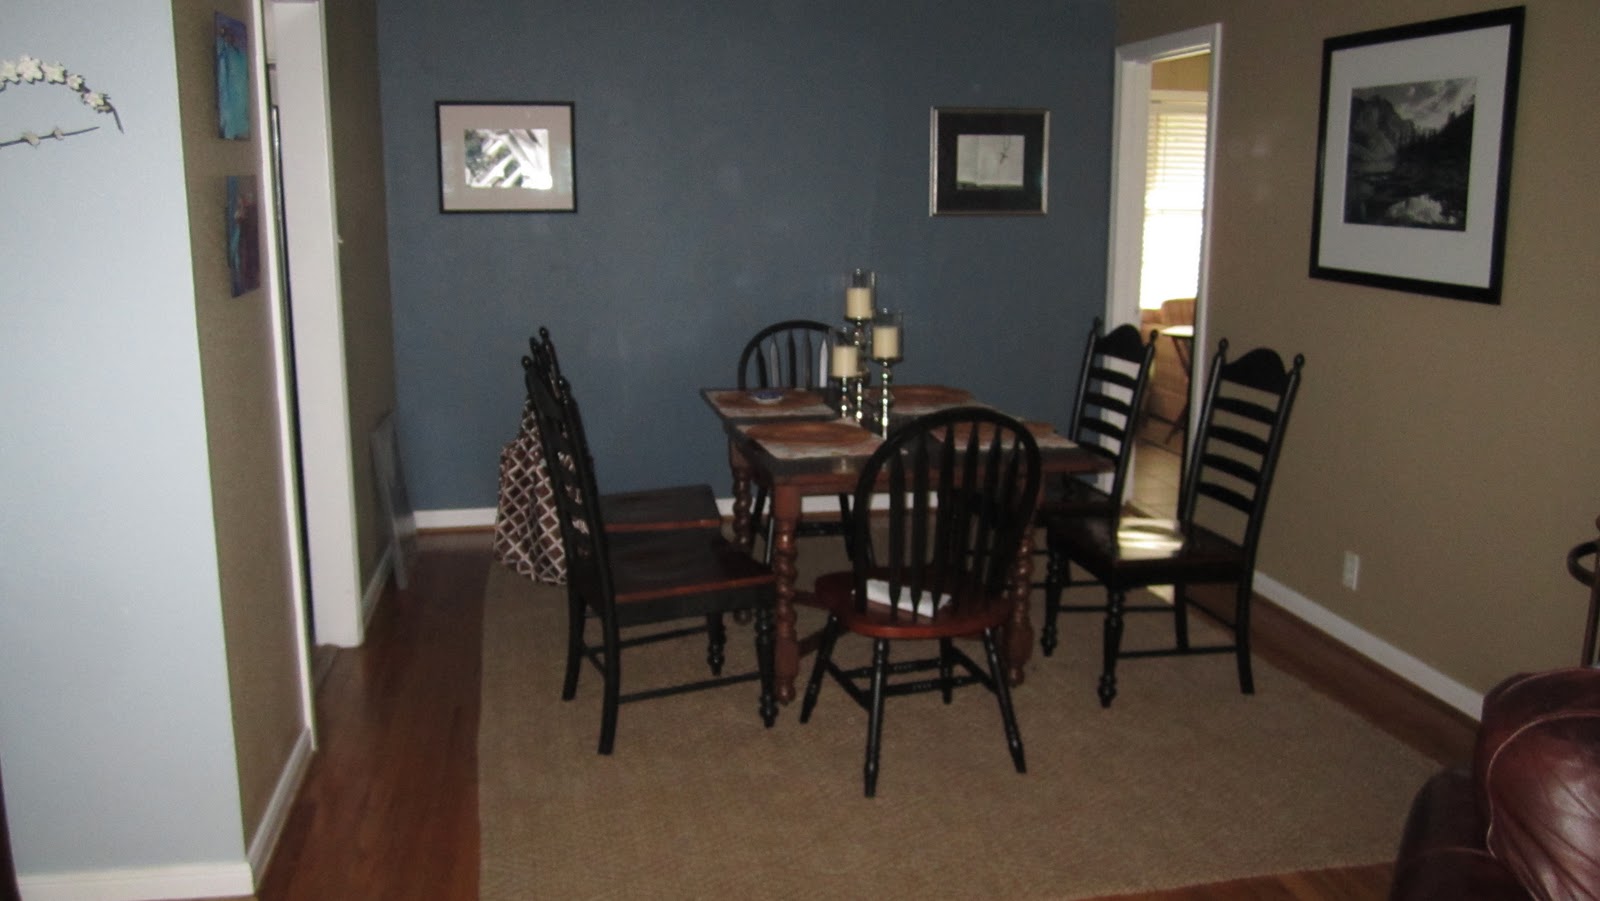
See- its so empty looking! So we went searching for something just right. The biggest issue was that it really couldn't be very deep at all so that we could still have a chair on the end. I ix-nay'ed a buffet because I thought if it were long it would be hard to come get in and out that door there in the back right corner- that goes to the Wii room and beyond. Then we were given the opportunity to inherit a china cabinet from P's parents. We went and looked at it and it was a perfect size. Maybe a little shorter than I wished for and maybe a little darker than what I was thinking but for free and sentimental family value it was PERFECT! Just what we needed, so we brought it home and I filled it up immediately! It was so exciting to see all of our wedding china and crystal that really hadn't been out of the box!


Isn't it so fun! And just a little punch of color that you aren't expecting!


Sunday, January 9, 2011
WW Pizza Casserole

Ingredients
1 lb lean ground beef
15 oz can tomato sauce (I buy Classico fire roasted tomato which is too big but usually one jar will have enough to make two pizzas and it keeps in the fridge for a while)
10 oz refrigerated pizza dough
1 1/2 cups shredded mozzarella
Season and brown the meat. Drain. Return meat to pan and add sauce. Heat until simmering. spray 9x13 dish with cooking spray and press dough into bottom of pan and up the sides (to creat a crust around the edge). Top with meat mixture. Bake at 425 for 12 minutes. Pull out of oven and top with cheese. Then bake for 5-7 minutes longer, until cheese starts to brown.
VOILA!
Subscribe to:
Posts (Atom)
